Deer Drawing Made Easy: A Complete Guide for Beginners and Artists
Introduction
Drawing animals can be both relaxing and rewarding. Among wildlife subjects, deer drawings are a favorite thanks to their elegance and gentle form. Whether you’re a beginner or a seasoned artist, learning to draw a deer can sharpen your observation skills and creativity. This guide covers everything from basic sketches to realistic artwork, using simple steps anyone can follow.
Why Drawing Deer is So Popular
- Graceful shape and movement
- Symbol of nature, peace, and elegance
- Perfect for practice with anatomy and proportions
- Looks beautiful in sketches, paintings, and digital art
Materials You’ll Need
- Drawing pencils (HB, 2B, 4B)
- Eraser (kneaded and regular)
- Sketchbook or drawing paper
- Fine-tip pen or marker (optional for outlines)
- Colored pencils or watercolor (optional for finishing)
Basic Anatomy of a Deer
Understanding structure is key to drawing realistic deer. Focus on:
- Head and antlers (oval-shaped skull, large eyes, tall antlers)
- Neck and shoulders (slender, with soft curves)
- Body (oval torso, thin legs)
- Legs and hooves (long, jointed limbs, tiny hooves)
- Tail (small, fluffy, pointed upward)
How to Draw a Deer: Step-by-Step
Step 1: Sketch the Basic Shapes
Start with circles and ovals to form the head, body, and joints.
Step 2: Outline the Body
Connect the shapes using light strokes to define the neck, torso, and limbs.
Step 3: Add Legs and Hooves
Use thin lines and angles to sketch the legs, knees, and tiny hooves.
Step 4: Draw the Head and Antlers
Add facial features, ears, and the branching antlers using reference images.
Step 5: Refine and Add Details
Erase guidelines and sharpen your outlines. Add fur texture, muscles, and shading.
Step 6: Final Touch
Go over your lines with a fine pen or add color for depth and realism.
Tips for Drawing Realistic Deer
- Use reference photos to study real-life deer anatomy
- Pay attention to shading to create depth
- Draw lightly first, then build up layers
- Practice different poses – standing, walking, looking back
- Use a blending tool (tissue or stump) for smooth shading
Types of Deer to Draw
- White-tailed deer – Common in North America
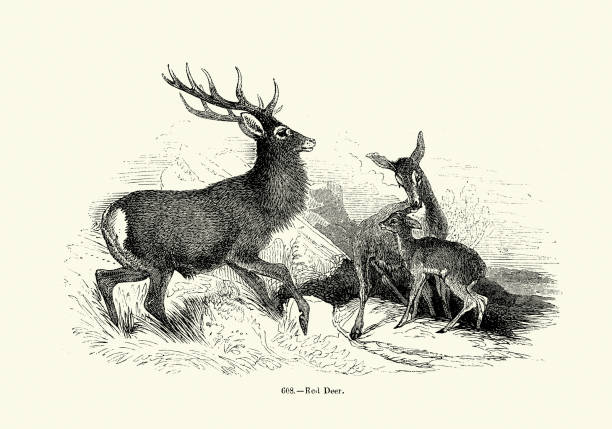
- Red deer – Found in Europe, with large antlers
- Fawns – Baby deer, often with white spots
- Reindeer or Caribou – Great for winter and Christmas themes
Using Deer Art in Projects
Deer drawings can enhance:
- Greeting cards
- Tattoos
- Home decor
- Wildlife posters
- Children’s books and illustrations
Digital Deer Drawing Tools
Prefer digital art? Try these software options:
- Procreate (iPad)
- Adobe Fresco
- Clip Studio Paint
- Krita (Free & open-source)
- Autodesk Sketchbook
Digital tools allow for undo, layering, and a cleaner process.
Common Mistakes to Avoid
- Misaligned legs or joints
- Over-simplified antlers
- Too dark lines in the beginning sketch
- Ignoring proportions (e.g., oversized head)
- Forgetting natural curves of the body
Deer Drawing for Kids
Want to teach children how to draw a deer? Make it fun by:
- Using basic shapes like circles and triangles
- Keeping lines simple and clean
- Adding cartoon eyes and expressions
- Coloring with crayons or markers
Benefits of Drawing Animals Like Deer
- Boosts observation and fine motor skills
- Enhances patience and focus
- Encourages appreciation for wildlife
- Builds foundational skills for all types of art
Conclusion
Drawing a deer isn’t just a fun artistic exercise—it’s a way to connect with nature, improve your technical skills, and express creativity. Whether you’re sketching a cute fawn or a majestic buck, the process is both calming and satisfying. Keep practicing, use references, and experiment with styles. Soon, you’ll be drawing deer that look like they could leap off the page.
Quick Recap – Deer Drawing Essentials
- ✅ Start with simple shapes
- ✅ Focus on anatomy and proportions
- ✅ Use shading and textures
- ✅ Try different deer species
- ✅ Practice often to improve
SEO Keywords
deer drawing, how to draw a deer, step by step deer drawing, easy deer sketch, drawing animals for beginners, realistic deer art, deer antler drawing, sketching wildlife, pencil drawing of deer, deer drawing for kids
FAQs
Q1: What’s the easiest way to start a deer drawing?
Start with simple shapes like ovals and circles to map out the body and head.
Q2: Which pencil is best for sketching a deer?
Use HB for outlines and 2B or 4B for shading and depth.
Q3: How can I make my deer drawing more realistic?
Study reference photos, pay attention to muscle structure, and use shading for volume.
Q4: Can kids learn to draw deer?
Absolutely! Use simplified shapes and make the process fun and easy.
Q5: Should I draw antlers on all deer?
Not always. Female deer and fawns usually don’t have antlers.
Related Post
Adorable Lionhead Bunny For Sale | Find Your New Pet
Discover the perfect Lionhead bunny for sale to become your cuddly new companion. Find healthy, [...]