
Unleash Your Creativity: The Ultimate Guide to Pet Paints and Pawsome Designs
Introduction
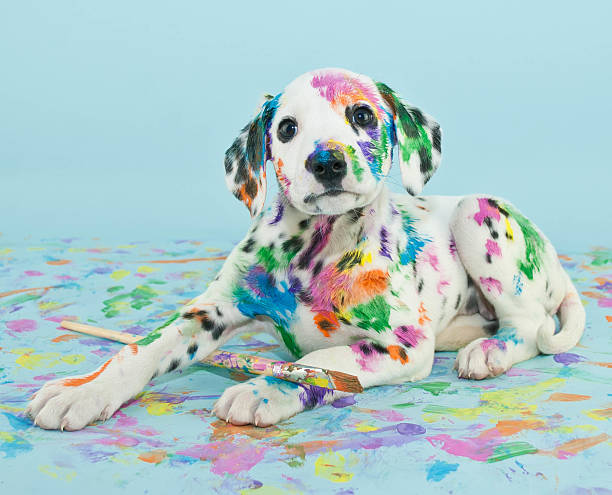
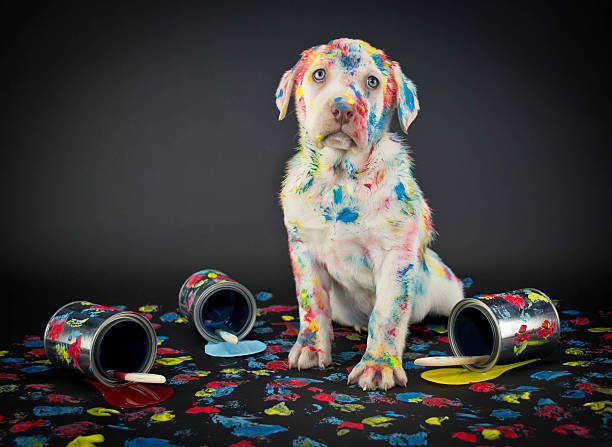
Welcome to the colorful world of pet paints and pawsome designs! If you’ve ever looked at your furry friend and thought, “I wonder what they’d look like with a splash of color,” you’re in the right place. In this ultimate guide, we’ll explore how you can unleash your creativity with pet-safe paints and create stunning designs that both you and your pet will love. From understanding the basics to advanced techniques, let’s dive into the vibrant world of pet art!

1. Understanding Pet Paints
1.1 What Are Pet Paints?
Pet paints are specially formulated, non-toxic colors designed for use on animals. Unlike regular paints, these are safe for pets and are designed to be easy to apply and remove. They are ideal for temporary designs and can add a fun element to your pet’s look.
1.2 Safety First: Choosing Non-Toxic Paints
When selecting pet paints, always prioritize safety.Choose items that are specifically marked as non-toxic and hypoallergenic.
Avoid any paints not specifically designed for pets, as they may contain harmful chemicals.
2. Preparing for Pet Painting
2.1 Gathering Your Supplies
Ensure you have all necessary items ready before you begin.
Essential items include:
Pet-safe paint
Brushes or applicators
A gentle pet shampoo for cleanup
Towels to protect your workspace
2.2 Creating a Comfortable Environment
Ensure your pet is calm and comfortable.Select a serene area where you can work uninterrupted.
It’s a good idea to do a test patch on a small area first to see how your pet reacts.
3. Basic Pet Painting Techniques
3.1 Simple Designs for Beginners
Start with easy, simple designs. Paw prints, hearts, or stars are great for beginners. Use a small brush to apply the paint gently, and make sure to reward your pet with treats and praise to make the experience positive.
3.2 Step-by-Step Guide for Basic Patterns
Choose Your Design: Start with something simple.
Prepare the Paint: Ensure the paint is well-mixed and ready.
Apply the Paint: Use gentle strokes and avoid sensitive areas.
Dry Time: Let the paint dry completely before letting your pet move around.
4. Advanced Pet Painting Techniques
4.1 Creating Complex Patterns
Once you’re comfortable with basic designs, you can experiment with more intricate patterns. Think of floral designs, geometric shapes, or even themed looks like holidays or special occasions.
4.2 Using Stencils for Precision
Stencils can help you create precise and intricate designs. Place the stencil gently on your pet’s fur and apply the paint through the openings. Be sure to use a stencil that’s appropriate for your pet’s size and fur length.
5. Pet Paints for Different Types of Fur
5.1 Short Fur vs. Long Fur
Different types of fur can affect how the paint is applied and how long it lasts. Short fur may hold paint better, while long fur might require more careful application to avoid clumping.
5.2 Managing Pet Paint on Sensitive Areas
Be cautious when painting around sensitive areas like the eyes, ears, and mouth. Use smaller brushes and apply paint carefully.
6. Removing Pet Paints Safely
6.1 How to Wash Off Paint
To remove paint, use a gentle pet shampoo and warm water. Avoid harsh scrubbing; instead, work the shampoo into the fur gently. Rinse thoroughly and repeat if necessary.
6.2 Tips for Avoiding Paint Residue
Ensure all paint is thoroughly rinsed out to prevent any residue. If paint remains, it might irritate your pet’s skin.
7. Creative Ideas for Pet Designs
7.1 Seasonal and Holiday Themes
Celebrate seasons and holidays by dressing up your pet with themed designs. Whether it’s a festive pattern for Christmas or spooky designs for Halloween, themed pet paints can add a lot of fun!
7.2 Personalized Pet Art
Make your pet truly unique with personalized designs. Incorporate their name or favorite patterns to create a one-of-a-kind look.
8. Potential Challenges and Solutions
8.1 Dealing with Pet Movement
Pets might not always stay still, which can make painting challenging. Try using treats and positive reinforcement to keep them calm and distracted.
8.2 Addressing Allergic Reactions
Monitor your pet for any signs of allergic reactions, such as itching or redness. If you notice any adverse reactions, remove the paint immediately and consult your veterinarian.
9. Conclusion
Pet painting is a fun and creative way to express your love for your furry friend. By choosing safe paints, preparing your pet properly, and experimenting with different designs, you can create beautiful and memorable looks. Always prioritize your pet’s comfort and safety, and have fun with the process!
FAQs
1. Are pet paints safe for all animals?
Pet paints are designed specifically for animals, but it’s always a good idea to check with your veterinarian before use, especially for pets with sensitive skin or health issues.
2. How long does pet paint last on fur?
Pet paint is generally designed to be temporary and may last a few days to a week, depending on your pet’s activity level and the type of paint used.
3. Can I use regular craft paint for my pet?
No, regular craft paints can be harmful to pets. Always use paints specifically labeled as pet-safe.
4. What should I do if my pet eats some of the paint?
If your pet accidentally ingests paint, contact your veterinarian immediately. Most pet-safe paints are non-toxic, but it’s best to err on the side of caution.
5. How can I make the painting experience enjoyable for my pet?
Use treats, positive reinforcement, and keep the sessions short and stress-free. Ensuring your pet’s comfort will make the process more enjoyable for both of you.
Related Post
“Ultimate Guide toDog Teeth Cleaning Near Me: Everything You Need to Know”
Introduction Ensuring your dog's dental hygiene is essential for their overall health. Just as humans can [...]